To setup Hosted Zimbra as a Secondary account using Zimbra Connector, alongside your current email, please do the following.
Downloading & Installing Zimbra Connector
Zimbra Connector can be downloaded from the following link: http://mirror.neural.net.au/Business%20E-mail/
Please choose either the 32bit or 64bit connector depending on your system type. If in doubt, the 32bit will generally work on most machines.
Once downloaded, run the installer and follow the prompts.
Creating a New Profile
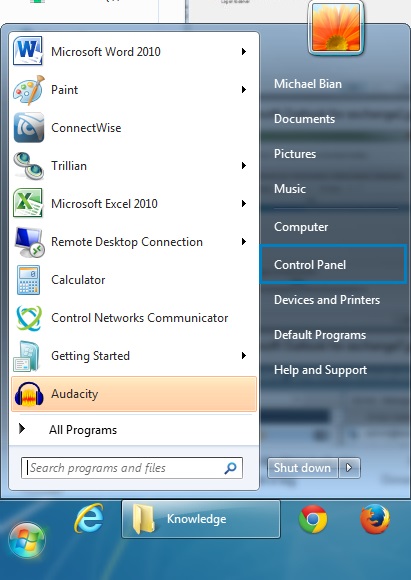
Create a new profile for your Zimbra by selecting Start (1), then Control Panel (2)
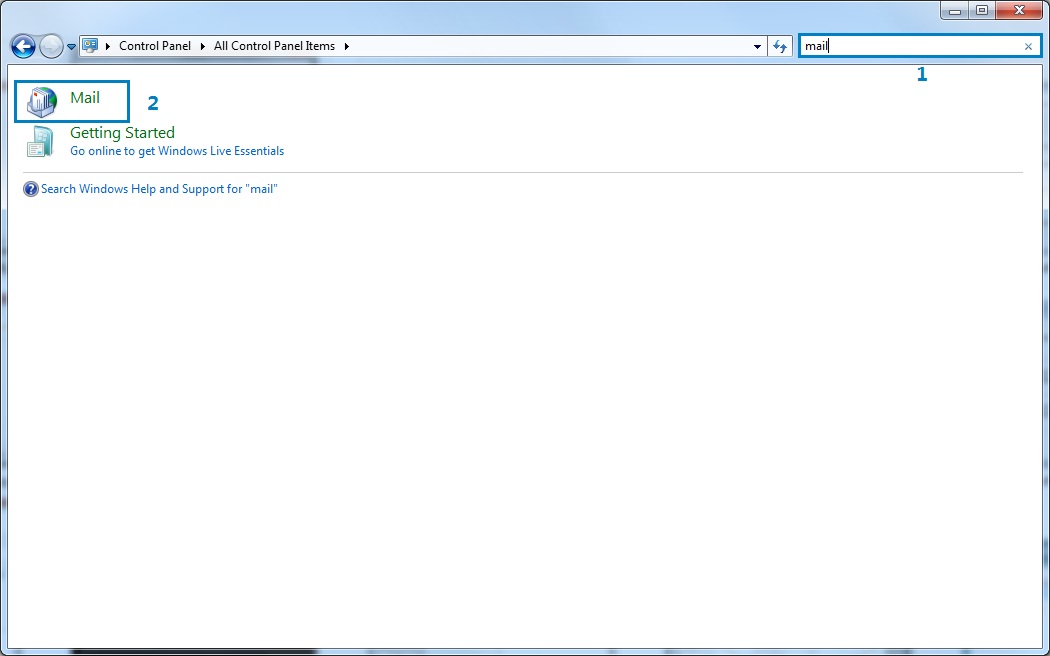
Enter the term Mail into the search bar (1), then select the Mail settings icon (2)
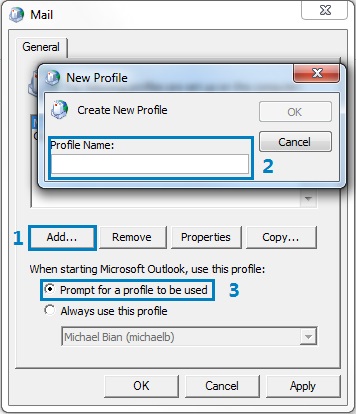
Click the Add button (1), enter the name for your profile (2) and click OK. If you wish for Outlook to automatically load this profile at startup, rather than prompt, select Always use this profile, and choose the new profile from the dropdown (3).
Adding Hosted Zimbra to the Profile
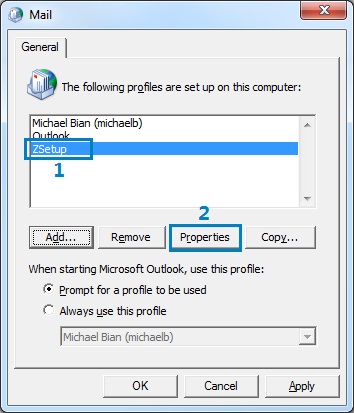
Highlight your new profile (1), then click Properties (2)
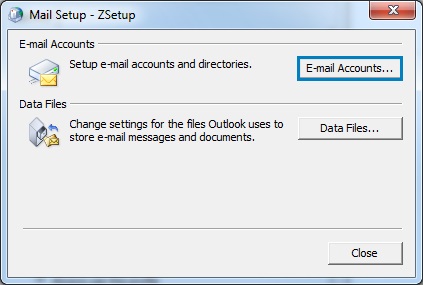
Choose Email Accounts from the popup
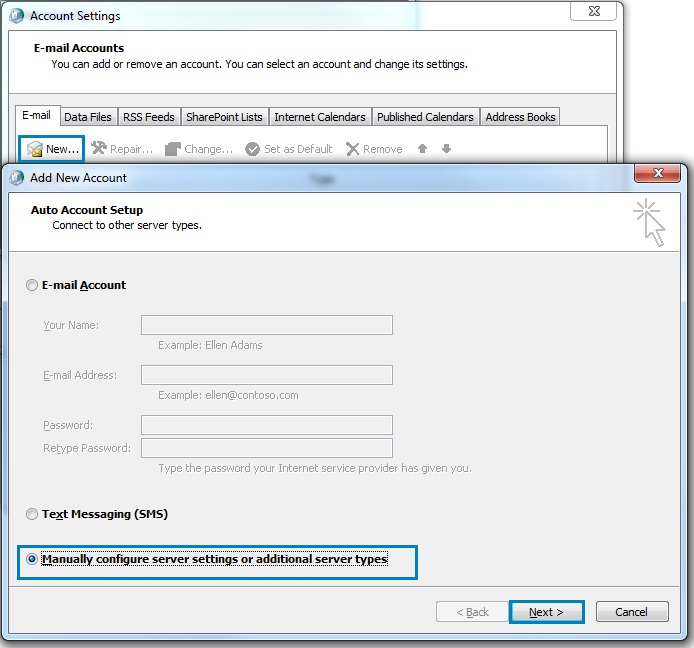
Click the New... button on the email tab (1), then select Manually Configure server settings or additional server types (2) and click next (3)
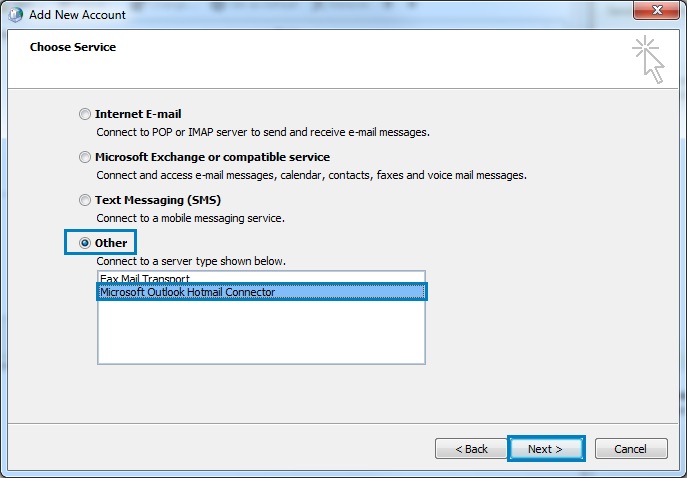
Select Other (1), then choose Zimbra Collaboration Server (2) from the list, followed by the Next button (3)
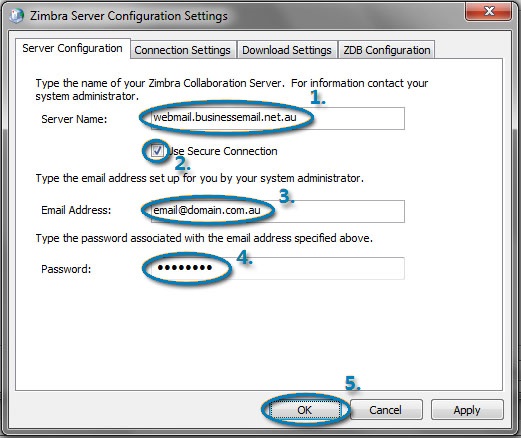
Enter the details as follows, then click OK:
Server Address: webmail.businessemail.net.au (1)
Use Secure Connection: Yes (2)
Email Address: The email address you were provided (3)
Password: The password you were provided (4)
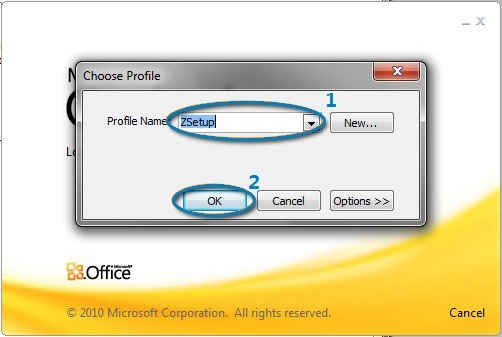
Finally, start Microsoft Outlook. If you did not set Always use this profile earlier, you will be prompted to select your profile. Choose the profile name from earlier (1) from the dropdown box and click OK (2). If you would like to set Zimbra as your default Outlook profile, select Options, then tick Set as Default before clicking OK.
Your Outlook is now setup with the Hosted Zimbra platform.

