To setup your 3CX server to use one of our SIP trunks, please login to your VoIP Commander account, choose Devices & Trunks, then Connect a new device. Select 'Connect an IP-PBX System' and take note of the details provided, specifically username (09XXXXX) and password.
If you don't already have a phone number allocated to your account, please order a new number from the Phone Numbers tab.
Once the above steps are completed, login to your 3CX server control panel, select SIP Trunks from the menu, the click Add SIP Trunk.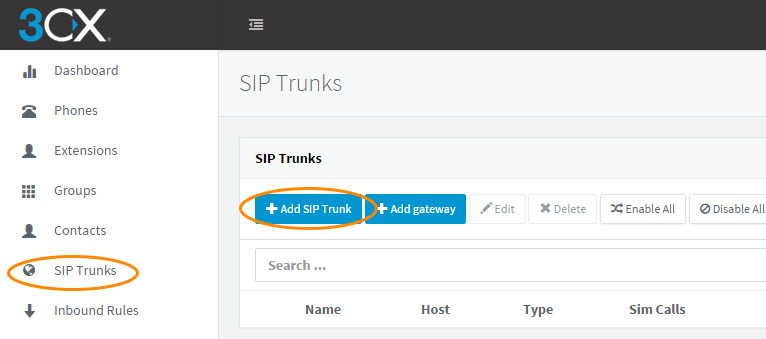
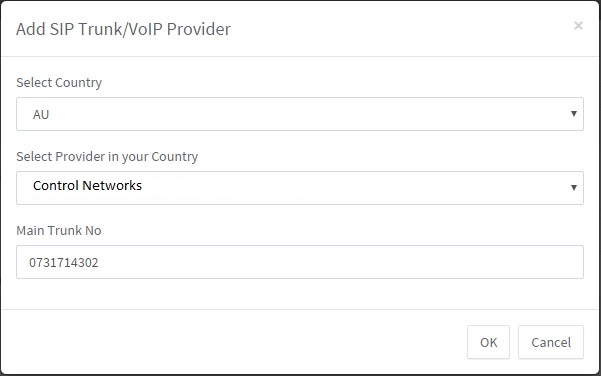
From the provider selection menu, select AU as the country, Control Networks Technology Services as the provider, then enter the main phone number associated with this trunk (or enter the one selected earlier) and click OK
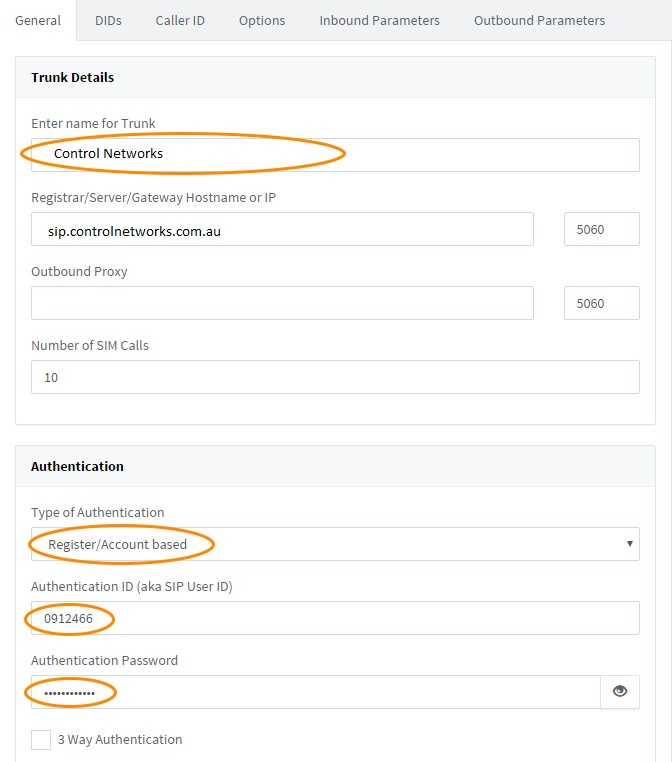
Set the desired name for this trunk if required, then under Authentication, select Register/Account based for Type of Authentication and enter the Authentication ID (09XXXXX) and Password of the trunk you created previously.
On the DIDs tab, add any extra phone numbers that have been routed to this trunk. This is required for all DIDs that will receive calls on this trunk.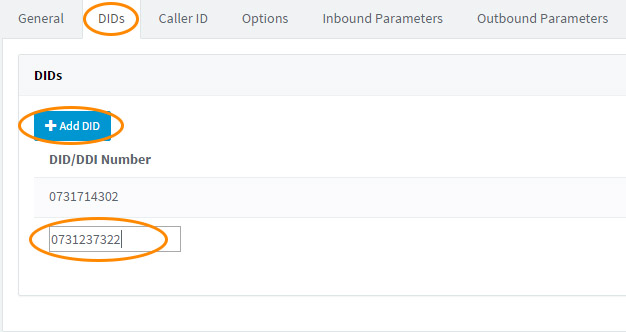
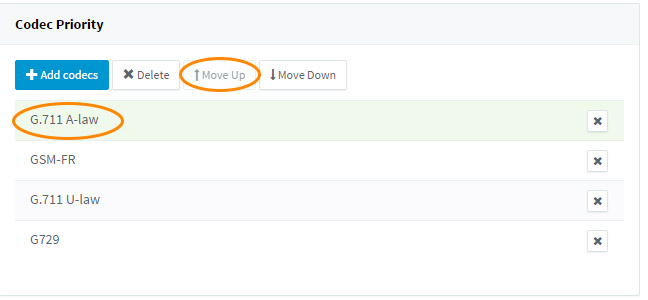
To ensure the best quality calls, from the Options tab, scroll to Codec Priority. Highlight G.711 A-law, then move this to the top of the list.
Click the OK button at the top of the page to save your trunk. After several seconds, click the Refresh Registration button. Your new trunk should have a green icon indicating it can now be used to place calls.
From here, please consult the 3CX Admin manual to configure extensions, dialplans and so on. This guide can be found here: http://www.3cx.com/docs/manual/

