To configure your Gigaset cordless handset for Business VoIP, please navigate to the phone's IP address in your browser. You can find the IP by choosing Menu > Settings > System > Local Network > IP Address.
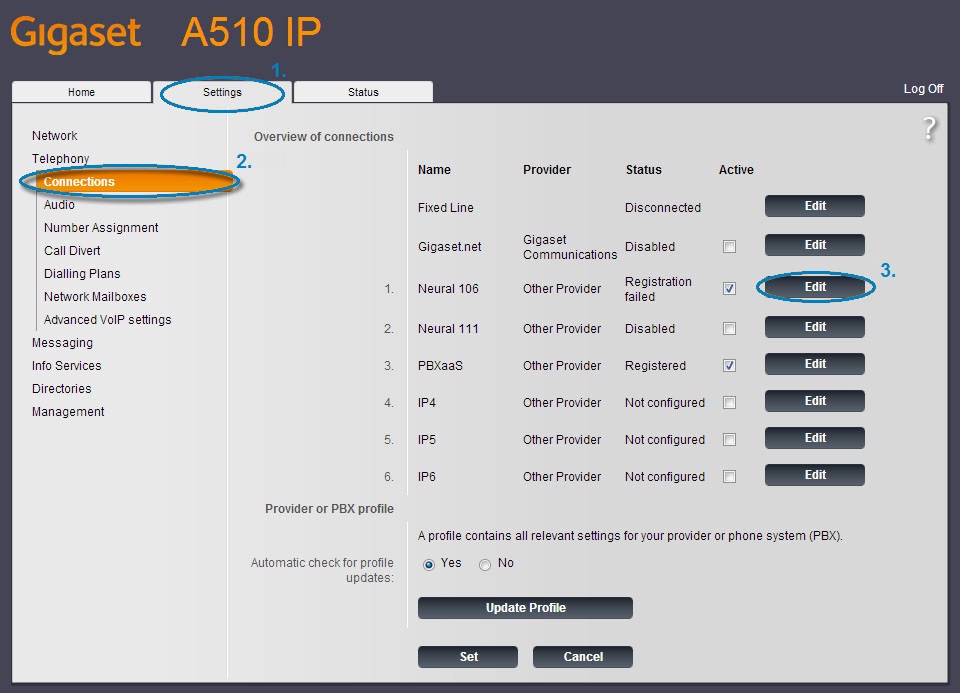
Once logged into the web interface, select the Settings tab, choose Connections, and press Edit next to the connection number you would like to configure.

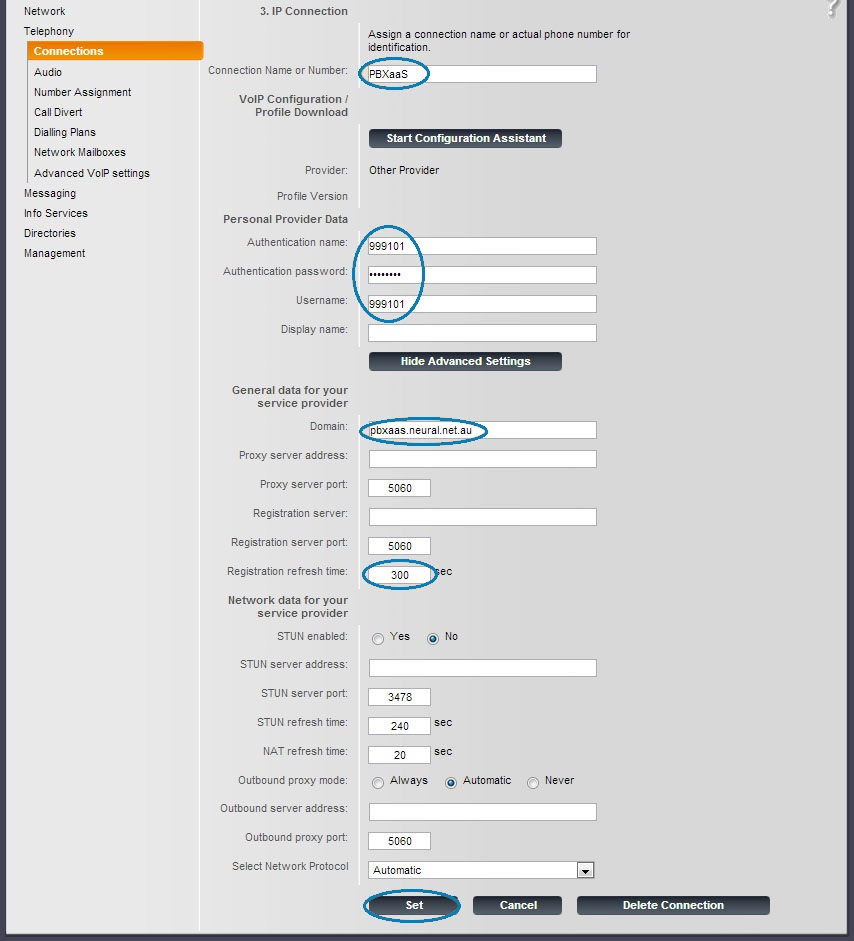
One the connection information screen, set the connection name to something appropriate for identifying the account.
Enter the Authentication Name and Username as the 6 digit username provided for your extension, along with the password.
Your username and password for the device will have been sent to you in an email. If you don't have this email, or are looking it up at a later date, you can find it by logging into Neural VoIP Commander (VoIP.neural.net.au > Devices) and clicking edit next to the desired device. The username and password are located in the Authentication Settings section.
Set the domain to cr0.sip.neural.net.au and the refresh time to 300 sec and click Set.

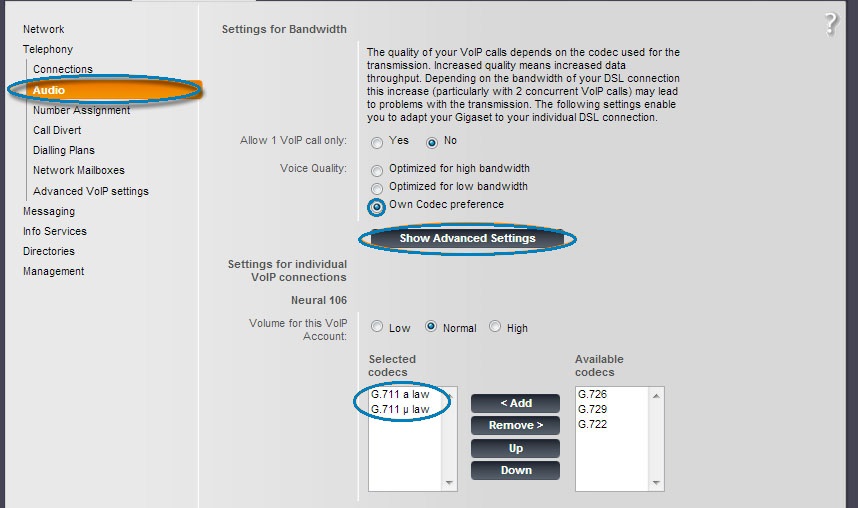
Choose Audio from the Telephony section on the left. Select Own Codec Preference, followed by Show Advanced Settings.
Remove all codecs except G.711 alaw and G.711 ulaw from the list, ensuring G.711 alaw is at the top of the list as shown. Save your changes.

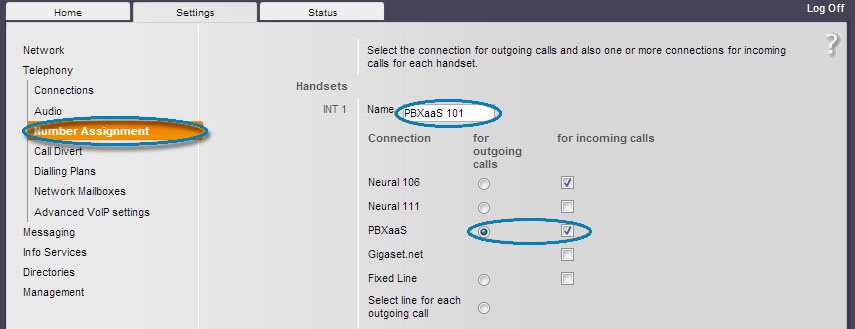
Select Number Assignment from the navigation pane on the left. Enter the Name as your desired display name on the Handset and select the account you created above for both outgoing and incoming calls. Save your changes, and you can begin using your handset.


