If you would like to have a custom Caller ID Prefix for any of the following levels in PBXaaS see the following instructions to setup.
This is handy for when you want to identify what DID or Queue the customer called in on or was directed to from your dial plan.
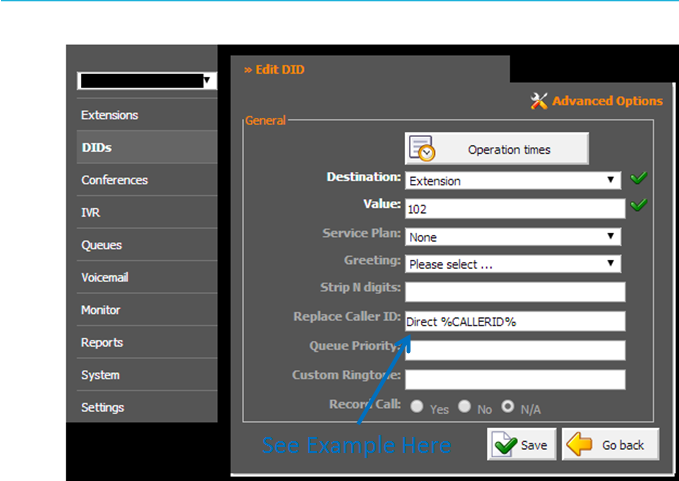
How to Add a Caller ID Prefix to a DID
- Choose the DID that you want to add the Caller ID Prefix to and click the edit option.
- Then click the Advanced Options button.
- Under the General Section you can add the Prefix in the Replace CallerID field, you can type what you want to appear and then add a space and %CALLERID% (see below for example).
- Once you are happy that you have completed the previous step save and reload the PBXaaS.

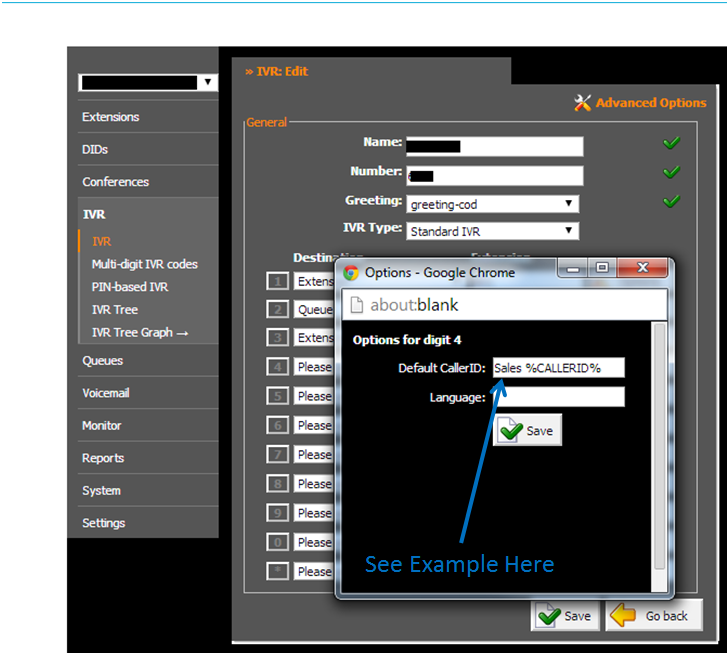
How to Add a Caller ID Prefix to an IVR
- Choose the IVR that you want to add the Caller ID Prefix to and choose Advanced Options.
- Choose the Destination that you want to add the Caller ID Prefix to and click Options button.
- A Popup window will appear and you can add the Prefix in the Default CallerID field, you can type what you want to appear and then add a space and %CALLERID% (see below for example).
- Once you are happy that you have completed the previous step save and reload the PBXaaS.

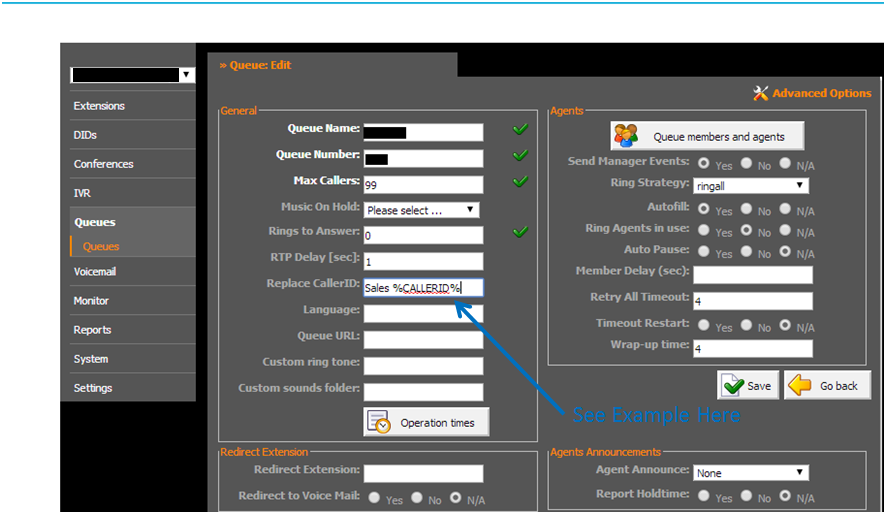
How to Add a Caller ID Prefix to Queues
- Choose the Queue that you want to add the Caller ID Prefix to and click the edit option.
- Then click the Advanced Options button.
- Under the General Section you can add the Prefix in the Replace CallerID field, you can type what you want to appear and then add a space and %CALLERID% (see below for example).
- Once you are happy that you have completed the previous step save and reload the PBXaaS.


