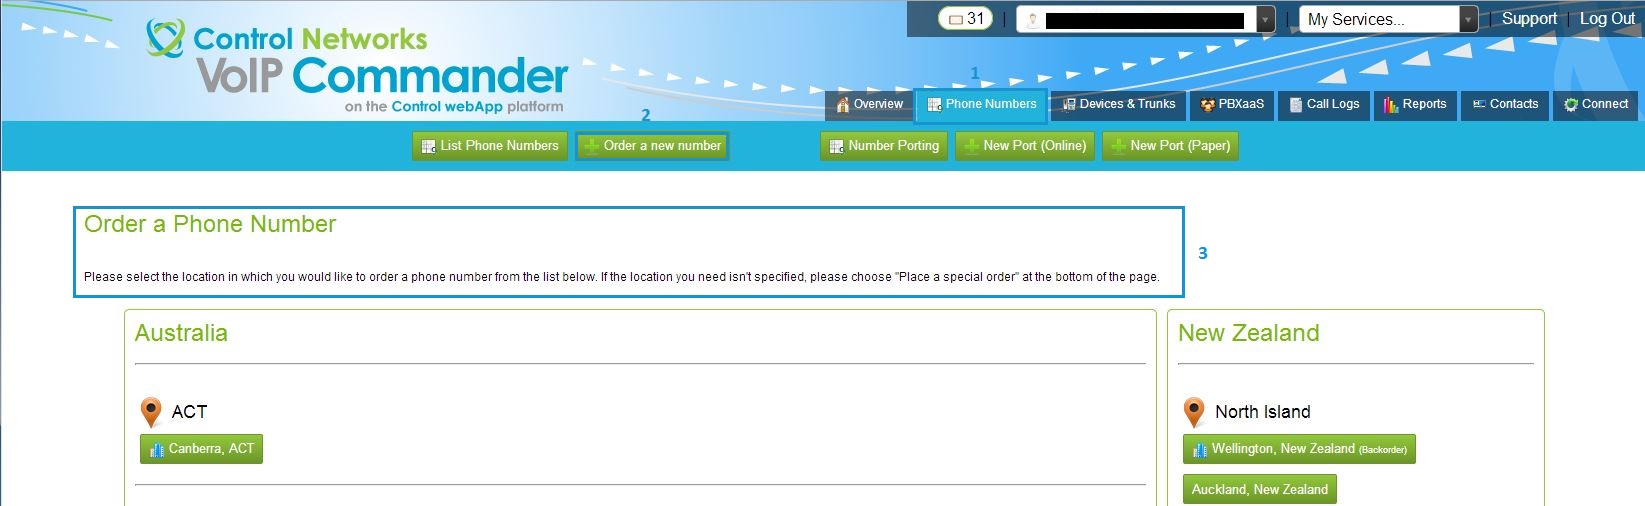
Ordering a new number
Log in to Control Networks VoIP Commander (http://voip.controlnetworks.com.au) with your Customer Portal username and password. Once logged in, select the Phone Numbers tab and click Order A New Number.
Select your desired location from the presented list, then select if you would like a single number or a range (10+) of numbers from this location. If you select single number, you will be presented with a list of numbers from our pool, simply select the one you would like, click next and optionally enter a description.
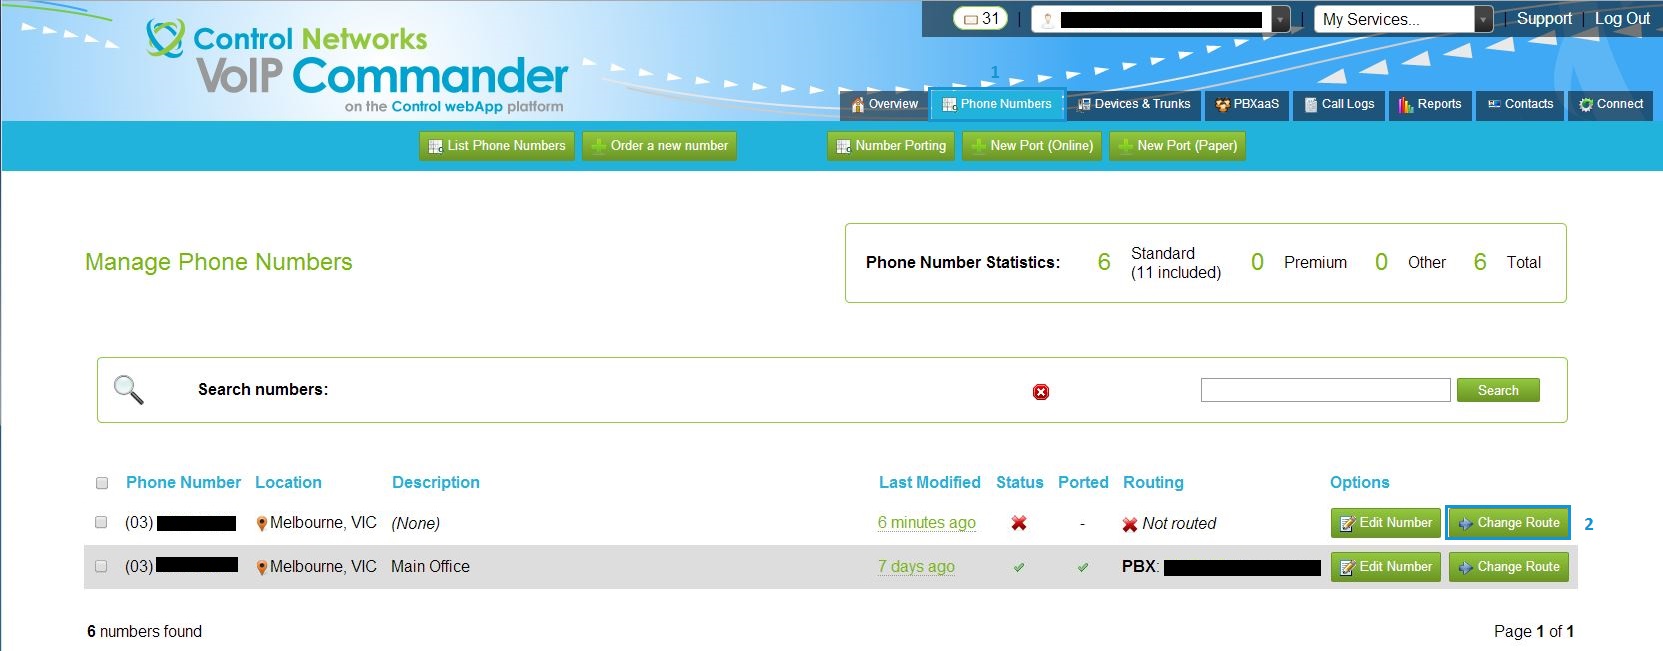
Your phone number/s will then be added to your account and will appear under the Phone Numbers tab.
Adding the number to your PBX
Please note, this is only applicable for PBX as a Service SOHO, Standard and Unlimited editions. For all other versions, please contact ithelpdesk@controlnetworks.com.au with your request.
On the Phone Numbers tab in VoIP Commander, find the number you would like routed to your PBX and click the corresponding Change Route button. From the destination type, select PBX, then select your PBX as a Service from the dropdown and click save. Repeat this process for any other numbers you require routed.

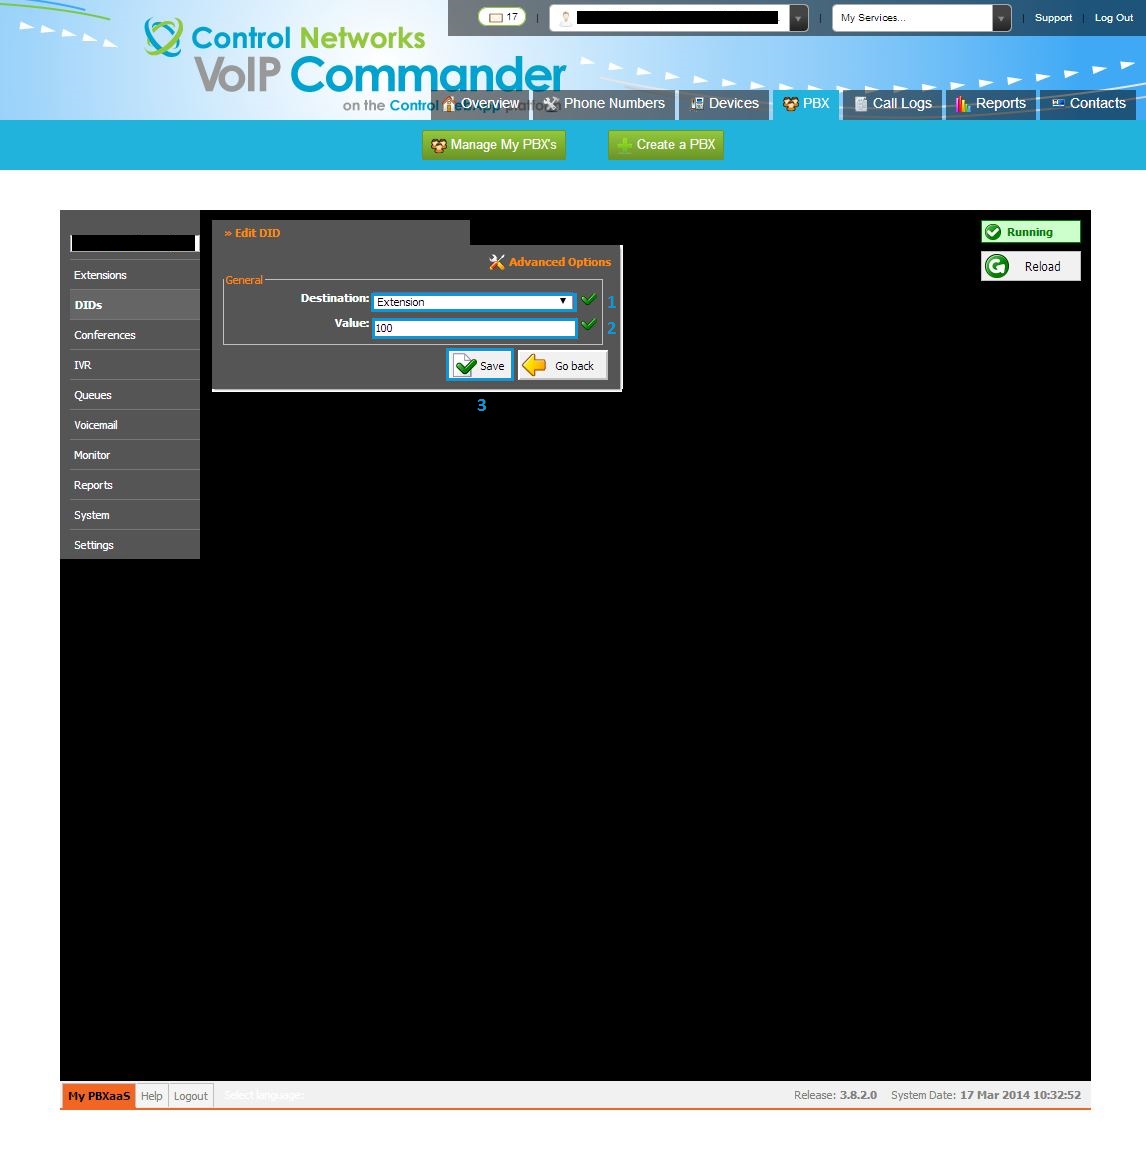
Setting the destination in your PBX
In VoIP Commander, select the PBX tab, then the Manage button for the PBX you routed the number to. Once the interface has loaded, select DIDs from the left hand navigation menu. Scroll through the pages or use the search bar at the top to find the DID you would like routed, and click the edit button. Select your destination type and enter the destination's ID number and click save.
The routing change may take up to 5 minutes to take affect. After this time, if you are still having issues routing the number, please check the destination details. If these are correct, please contact our support team by emailing ithelpdesk@controlnetworks.com.au